Showing posts with label house remodel. Show all posts

Friday, February 20, 2015

Five Tips to Save on Home DIY Projects


Something about me you should know, I like being thrifty and finding a good sale.  Through the years I have found a few ways to be able to save money on all of those home projects.  Whether it be for smaller decor items or bigger ticket items, there are ways to save some pennies.  Check out a few below and some project ideas too!


1. Paint - One of the easiest ways to change up your spaces in your home.  When we moved in we had to paint pretty much every inch of our house, in and out.  All of that paint really starts to add up.  There are ways to find paint very inexpensively.  Depending on your project you may not be that set on a certain shade or, if you are really patient you might just luck out.  My favorite place to check out every time I visit Lowes or Home Depot is the Oops paint section.  Usually its a little shelf nearby the paint mixing area.  Gallons go for $5 and quart for $2.50 (usually).  I painted the inside of our walk-in closet and our laundry room floor with paint I found on the oops shelf!  I have also painted several pieces of furniture with oops paint as well.  Like I said, I check every time and if its something I like I usually grab it...you never know! Another great place to check for discounted paint is the Habitat Restore, another place for finding paint for those furniture projects!


2. Fabric - I mentioned this earlier this week when talking about recovering our ottoman, but I get creative when searching for fabrics for different home projects.  Fabric from the fabric store can often add up if you need a lot for a project.  So, I'm always on the look-out for discount fabric items I can re-purpose into something.  I'm talking about shower curtains, sheets, table cloths - anything.  Target is a great place to look for these kind of items in the clearance section (usually the aisle end caps).  This is another thing I often check when I have the time.  Also, don't throw away any of your scraps.  I have used fabric scraps for jewelry, wreaths and garlands.  I never waste a inch.


3. Repurpose - Lots of times you have things already in your house you can repurpose into something new.  Anything from gift bags and paint chips turned to artwork to chop sticks and washers into a fun mirror accent - you never know.  What items are lurking around your home that could be reused and made into something cool?


4. Get Thrifty & Creative - You don't have to be a thrift store pro to find a good piece to redo.  I don't have time to constantly check craigslist, go to yard sales every week or even to thrift stores every week.  But, if I'm on the hunt for a certain thing I will always check these places first.  You never know what you might be able to find.  Every so often I will pop into our local restore and just check out what they have.  I have found some awesome deals, especially when they have marked down an item.  After an item has been in their store for over 30 days it gets drastically reduced.  Restore is also a great place to find doors and old wooden chairs.  Two things I love.  A cabinet door plus some chalkboard paint can become a really cute project at almost nothing - thrifty and creative!  And, don't forget free things like pallets!  We have made chalkboard signs out of pallet wood and recently repurposed one into a shelf.


5. Be Patient - This one is hard I know! But, just taking some time to research prices and wait for sales is huge.  Also being patient will allow you to really figure out what you need.  Sometimes we can be drawn to something but realize later its just not going to work.  Being patient helps weed out those impulse purchases.

Those are just some of the ways we have saved on diy projects around our home.  Do you have any more ideas?  Share with me!


Tuesday, May 7, 2013

Adding a little More Curb Appeal

We have been working, working, working on this little house of ours and because of that this little blog of mine has been neglected a bit.  The cool thing is - I have a bunch of projects to share coming up - so I'm excited about that.  One of which is our finished patio!  I can't wait to share how it turned out.   Pretty much as soon as we finished we had a monsoon roll in so I haven't been able to get any good after pics - looks like it might be a good day for taking some after shots - so stay tuned.

One of our goals for this spring is to get our yard cleaned up, neat and pretty.   We shared some in our painting the house post about how we have begun adding some character to our yard with new plants and mulch and a new walkway.  It was definitely time for some color though.

I have to brag a little and say that I have the sweetest husband ever.  I went and grabbed a yellow rose bush to plant in the front and also some veggies and herbs for our side bed.  A few days later Justin came home with a lot more herbs and four more rose bushes.  How sweet is he?  Look how pretty they are....


I hated the exterior of this house so much when we moved in - from the paint choices to the landscaping.  I love it so much now.  Look how far we've come...


It doesn't even seem like the same house.  


I also have a little side plant bed that was nothing but weeds when we moved in...and pretty much has stayed that way for the last two years.  It has been driving me crazy and I needed to do something about it.


I started by getting rid of the weeds and adding soil.  We actually added some soil in from the patio dig out a few weeks ago.  I also purchased some garden soil to supplement as well.  A little poking and tilling around was needed to break up the ground a bit and prepare it for planting.  This pic below is how its looked for the last few months.


I planted some of the veggies and herbs I had and I'm still working on getting the rest in (between patio building and major downpours).  I opted to make this a veggie and herb garden as opposed to a flower bed.  This area gets lots of sun and I love that its right outside the kitchen door (perfect for grabbing some fresh herbs while cooking).


Some of Silas' little seedlings have even made it in there.


Oh, I planted a blueberry bush too - does anyone have any pointers for growing blueberries??


We spend a lot of time outdoors so all of these little updates are so exciting to me.  The patio post is coming soon!  Also, tomorrow is the spring edition of the pinterest challenge.  Remember when I was a guest host in the winter?  Yeah, that was crazy.  I have a project I'm working on for that and hopefully will be finished before tomorrow so I can share!  Can't wait to see what everyone has done this time!

Anyone else working on prettying up your yard?  Share with me!!

Have a great day!

Wednesday, May 1, 2013

Building the Patio - Choosing Pavers

Its definitely time for an update when it comes to the patio.  Things have been moving rather slowly around here - well at least when it comes to patio building.  Over the weekend our goal was to pick out, purchase and lay down the patio - that however did not happen.  Seems as though choosing a paver took a little longer than originally thought and then loading them and unloading them took longer than expected as well.  Its just the way projects go sometimes.  So, I don't have a finished patio to show you yet but we do have pavers.....


As you can gather we actually have two different kinds going on.  I wasn't necessarily planning on choosing a paver and a brick but when I saw this brick I really kind of loved it.


Its called Old Towne Blend by Pavestone.  I love the variation of colors and after some deliberation we all (Me, Justin, Mark and Buddy) decided that it would be a nice accent.  


Now, on to the main paver.  Originally I was just thinking of going with something really plain.  I didn't like square and I didn't want anything that would be rough and leave an uneven surface (its surprising how many pavers are bumpy...who wants to sit on a bumpy patio?)  But everyone else wasn't feeling my decision.  So we kind of went back and forth several times.  


After finding the brick and agreeing it would make a great accent I was really liking this square paver - this one is Nantucket's Yorkstone Tan Variegated.  The variation of color is really nice and it has a slight texture to it.  Its plain with a twist I would say.


We have been playing around with patterns this week - we are kind of liking this.  Honestly, I'm sure we will re-arrange and arrange again before we decide on the final pattern.


Slowly this week our plan is to start moving the pavers from the front yard to the back (something we haven't started yet).  This patio job is a ton of work from start to finish.  Everything is heavy and labor intensive.  I'm so thankful my toughest job yet was choosing which pavers we wanted.  Man, that was difficult/I'm kind of spoiled.  Someone has to make lunch though right?

 Hopefully we will have a finished patio by the end of this weekend!  Can't wait to share the finished project with you!

So have any of you guys ever started a project and have it take way longer than expected?  Do you have trouble choosing your project supplies sometimes?  Share with me!

Have a great Wednesday!!

PS - You can check out our previous patio posts here:  Building a Patio Part One, Patio Part Two

Wednesday, April 10, 2013

Painting the House Exterior - Finally

This post has been a long time coming.  It has pretty much been a year since we first began the big task of painting the exterior of our house.  It took us months and then I had little things here and there that I have been working on - and honestly I'm still working on.  But, I'm ready to share.  This has hands-down been our toughest and biggest task to date.  Painting your house exterior is no joke.  Its not necessarily hard (at least for a smaller one-level home like ours) just really, really time consuming.  I feel like I could share and share about this project.  This post is photo/word overload, just a warning.

Ok, so true story - I would not even go and look at this house while we were house shopping -just based on the exterior condition.  I hated it.  You can't tell from the photo below but there were lots of mis-matched paint touch ups all over the house.  It was so bad.  Weird thing though, after months of looking and a significant price drop we went and checked it out and loved it.  Our house is in an awesome location in the historic downtown area of our amazing town - which was huge for us and somehow we just immediately liked it when we got there.  So I guess you should never judge a book by its cover.  And if you really want, you can read my first ever post about that here.


Slowly but surely we have been working on the exterior. Getting the exterior painted was high up on our to-do list after we moved in.  We decided to do it ourselves to save some major cash.  Another true story - we actually paid for the majority of the paint with change that we had accumulated over time.  We didn't literally use the change, we cashed it out - but yes you can save your pennies and paint your house exterior.  We were pretty pumped about that.  


So paint color - we went with Valley Hills by Behr.  We used Behr Premium Exterior Paint.  This was a long, long process for me.  I flipped flopped and debated colors forever but ultimately this was and is the perfect color choice for us.  I simply love this gray/green shade.


Another debacle for us was what color to paint the foundation and also the concrete stoup.  We ended up going one color down on the color swatch and went with Painted Turtle by Behr.  I wasn't sure what kind of paint to use but the guys at Home Depot were great and pointed us in the right direction.  I have found that they seem to always have a really knowledgeable paint staff there - at least here they do.  


The shutters, trim, gutters (yes, you can paint them), railing and screen door were painted creamy natural by Behr.  We found it easy and best to remove the gutters (attached to the walls) to paint them.  Also, we painted the trim first - to me its easier to paint the trim and then cut in with the wall color after.  I don't know if that's how the pros do it or not - probably not, but it was the easiest and fastest way for me and it worked just fine.


I now love the cottage feel our house has.  The more we work on it and show it some love, the more we fall in love with it....hmmm that is just like our relationship with Christ.  The more we work towards a love-relationship with Jesus, spending time in His word and so on, the more we will fall in love with Him.


Oh, if you are wondering about the doors - we ended up painting them a dark purple color.  It was a Martha Stewart Living color that is no longer available.  Luckily we have enough left over for touch ups and such.  You can read all about painting our doors here.


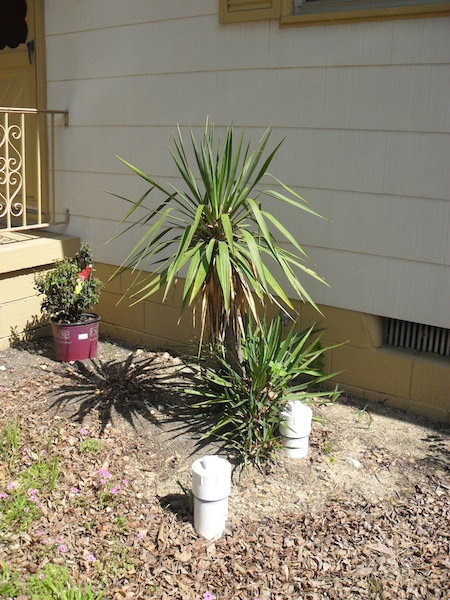
In addition to the painting we also have done a ton of work in the landscaping department.  Although we still have more work to do just removing of the old gross plants was a big task and huge improvements.  We have planted a few things in the front but have plans for a lot more.  We ended up keeping one original plant and just relocated it right next to our front stoup.  I can't tell you how happy I am that those terrible palm tree things are gone.


We also have a new walkway - I despised the original one. Once again this walkway adds to the cottage-ness of the house.  At first I think I was feeling I wanted to just modernize our exterior like crazy but as we go, I kind of like the sweetness and vintage vibe this home has.  Restoring something and staying true to its style is kind of nice to me.


So as far as calculating the amount of paint we needed I just asked the paint guy at Home Depot and he helped us through.  We went on the sparse side because we didn't want to over-buy.  We did end up going back twice and picking up extra paint.  I was totally ok with that because we only bought what we needed.  We used, I would say mid-grade painting tools like rollers and brushes...yes, this was all by hand and no spray painter used.  From what I read the spray painters you can rent are nice and quick but you waste paint.  If our house was any bigger though we really would have considered that because this took forever!


Would I paint the exterior of a house again - absolutely.  Do I want to do that anytime soon---no way.  If you are considering painting your house think about how long you think it will take you and times that by 3 or maybe 4.  We even had tons of help- which we are super thankful for.  All in all, we totally love the new paint job - its doing a lot for this old little house.

Ok, I think I'm all blogged out for the day.  And I'm sure you are tired of hearing about painting.

So, I would love to know - has anyone ever painted their house exterior?  How did it go?  Would you do it again???  Share with me!


Linking Up Here:

30 Handmade Days Pity Party

Thursday, March 7, 2013

House Number Inspiration

So funny story, I still have not written a post about painting our house exterior.  But - I promise our house has been painted (at least mostly).  DIY painting your house exterior is no joke.  We still have little spots here and there that I am slowly finishing.  For the most part its complete so I do intend on posting about it someday sooner rather than later.  Here's a little idea on the color palette we chose.  The purple color is not exact - our color is a Martha Stewart Living color which has been discontinued at Home Depot...so finding the original one online proved very difficult (but it's close).


Now that our house is painted and spring is right around the corner I have started to get an itch for continuing our work on the exterior and updating a few more things.  We need to continue our landscaping, finish our walkway, paint the mailbox, etc.  Today though, lets talk house numbers.  I kind of really love house numbers.  To me, they add so much charm and character to the front exterior of a home.  I have been to the big warehouse stores several times but just can't find anything I really like or that seems to fit our little cottage style house.

After perusing the internet though, I found several options that I really love...

Up first are these awesome tiled house numbers.  I love how pretty this is and I'm kind of thinking this could be diy'ed, hmmmmm.  


I absolutely love these white ceramic house numbers.  There is something vintage and yet modern about them.


These painted numbers are so charming and sweet.  This could totally be a diy project as well.  I love the pop of yellow.


Since our house color is a little on the darker side I like the idea of having just pretty white numbers against the house.  Love the style of these.


And finally this sweet hand painted number plate.  Its customizable and made from scratch by CMB Studio (etsy shop) and at only $28.00 I think a great price.  Etsy is great place to check out customized and handmade house numbers.


Ok, so those are some of the house number ideas that I'm digging right now.  So now we just need the weather to actually warm up and act like spring so we can get excited about working outside.  Are you guys starting to get that spring itch like me?  Whose ready for some outdoor projects?!!

Hope you all have a great Thursday!!


Monday, December 5, 2011

The Long Awaited Kitchen Light

For months now all of you have been so polite and have listened to me complain about the much hated fan jalopy that so beautifully adorned our kitchen ceiling.  It's just so ugly, so huge and took up so much space in our little house.  I wanted it out so bad but it just wasn't top priority and I also just couldn't decide what I wanted to replace it with. We weren't necessarily thinking about replacing it any time soon but as luck would have it the old thing broke and we had no other choice but to replace it - and on the inside we were jumping for joy that we finally had a good reason to do it.

Ain't she a beauty-


I knew I wanted to replace it with a light - no more fans in the kitchen, and I had also decided on some sort of pendant light so the decision really came down to cost - as most decisions normally do.  Boy, lights are not cheap and it was hard finding something that met my criteria and fit into our budget but it finally happened.  I came across a great pendant light at Lowe's on clearance and I was smitten - style and price.

Finding the light was the easy part - removing the old fan and installing the new light - not so much.

This is where I was going to have nice detailed pictures and explanations of the process.  But, that didn't happen.  It was a giant pain and it took both of my hands and Justin's hands for a lot of the project.

This fan monster wasn't going down without a fight, and fight it did.  Whoever had installed this fan must have thought very highly of it and though no one in there right mind would want to take it down - it was up for eternity.  So little by little, piece by piece it was removed.  I do have some of those pictures to share.


It was finally over and there was a huge sigh of relief.


Then we had some nice jerry-rigged electrical work going on that caused the light to not want to sit flush with the ceiling.  Isn't home improvement fun sometimes?


After working all of that out we finally have our new light - and we love it!  It was totally worth all of the frustration.


Let's go way back, just for fun...Remember this?  


We've come so far - but still have so far to go.


Check out our other kitchen projects here, here, herehere and here.

So what about you guys?  Have any annoying home improvement projects in the works?  Share with us!!

PS - Don't forget to enter our giveaway - it ends 12-12-11!!!